Course Information
GD&T Basics
Learners will be able to:
- Describe the differences between coordinate tolerancing and GD&T.
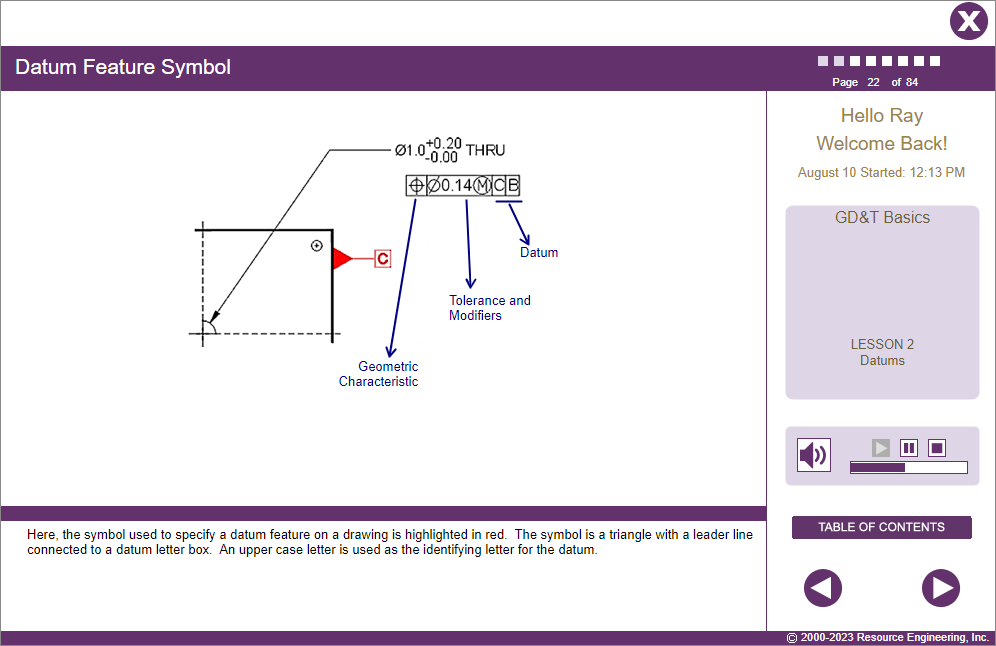
- Identify datum planes, points, and axis on a part drawing and know how to use a datum.
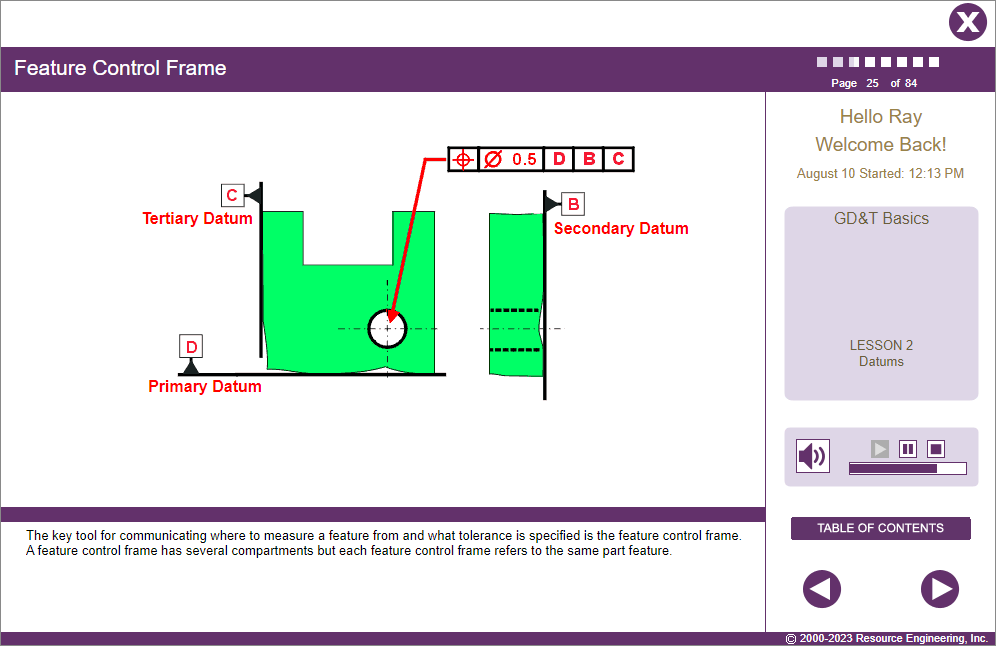
- Read and interpret feature control frames.
About This Course
Precision parts require precision measurements and that starts with knowing how to read blueprints and engineering drawings so that the proper measurements can be taken.
In this course, learners will be introduced to key terms used in metrology and GD&T and how to read and interpret basic engineering drawing and GD&T symbols.
- Basic math skills.
- English (EN-US)
- Chinese (simplified) (ZH)
- Czech (CS)
- French (FR)
- German (DE)
- Italian (IT)
- Japanese (no audio) (JA)
- Korean (no audio) (KO)
- Polish (PL)
- Portuguese (Brazilian) (PT-BR)
- Romanian RO)
- Russian (RU)
- Spanish (ES)
- Vietnamese (no audio) (VI)
Course Objectives
- Define key metrology terms.
- Read and interpret basic engineering drawing symbols.
- Understand GD&T terminology and symbols.
Course Outline
Lesson 1 – Language of Measurement
- Use the language of dimensional measurement.
- Convert English to SI (metric) units of measure and SI to English units.
- Understand basic terminology used on drawings and blueprints.
Lesson 2 – Datums
- Use a datum to locate the position of part features.
- Identify datum planes, datum points, and datum axis.
Lesson 3 – Introduction to GD&T
- Explain the differences between coordinate tolerancing and geometric dimensioning and tolerancing.
- Interpret feature control frames.
- Use the 14 geometric characteristic controls.
- Identify GD&T modifying symbols
Unit Test Challenge
- An assessment of the learner’s progress in this unit.

4.8 out of 5 stars
Comments from Learners About This Course
- I really enjoyed this course, easy to learn, pretty straight forward.
- Good intro to GD and T basics.
- It was good. I thought I knew GD&T.
You may also be interested in…
- Measurement Systems Analysis – Comprehensive training in how to statistically measure the accuracy and reliability of measurement systems.
- Gage Training – Focused on how to use precision hand gages to measure parts against blueprint specifications.