Training Administrator Help
Adding User Profiles
The first step to adding anyone to the system, whether a learner, supervisor, or administrator, is to create a user profile. There are several ways to add user profiles:
Here, we will discuss the first two options. The Bulk Upload Service is linked to a page that provides more detail on that option.
Adding a User Profile (one-at-a-time)
Adding User Profiles this way will give you the most flexibility in how you set up a user. It will give you access to fields you cannot change if you opt instead to add multiple users at once. Reasons you would add User Profiles using this approach include:
- You only have one or two users to add.
- Your user doesn’t have an email address and you are going to make use a username and use either your email address or enter NONE for email address. Learn more.
- You wish to include a Learner Identifier (described below) or a Phone Number.
- The users need to be assigned a Supervisor.
- Each User you add will have different Catalog Access permissions.
- The User(s) you are going to add will have a Role greater than Learner.
- The User(s) you are going to add will have a different Username than their email address.
- You want to set-up the Users to be able to self-assign courses, but you want to limit the number of credits they have available to use.
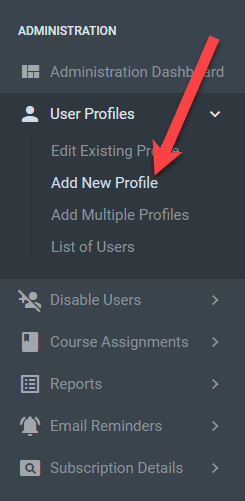
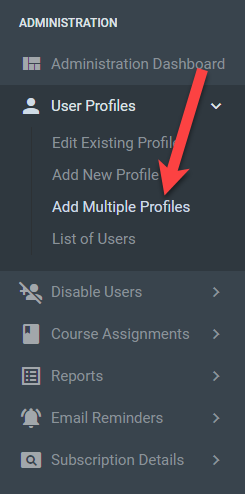
Select Add New Profile from User Profiles menu option in the Administration menu.
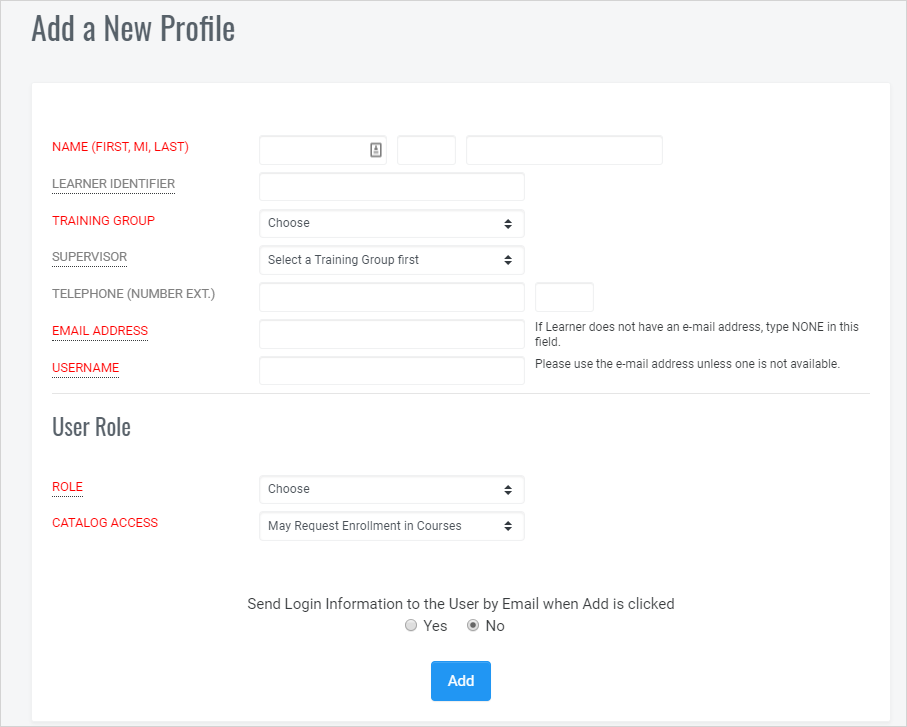
Complete the information on the screen. Items in Red indicate required info. Mouse over items with the dotted underlines for a tooltip on that item.
Name What you put in here is exactly what will display on Certificates of Completion and training reports. If you type a name in all CAPS or all lowercase, that is how it will appear on the certificate.
Learner Identifier (Optional) This is a field that you can use to distinguish users from one another for reporting purposes. For example, you might put the department or department code in here or perhaps the location where the User works. This way, when you run a report and include the Learner Identifier you can easily sort or filter the report by the Learner Identifier.
Training Group If you have more than one Training Group in your subscription, you will be able to assign the User to any Training Group you have administrative access to.
Supervisor (Optional) Select a Supervisor from the dropdown list if you wish a “supervisor” to have access to this User’s training records.
Telephone (Optional) This is an optional field.
Email Address Enter the User’s Email Address. We recommend that you use all lowercase because this will auto-populate the Username field and all lowercase reduces confusion when users login. If the User does not have an email address, you have a couple of options: 1) Type NONE or 2) Enter the email address for the User’s Supervisor or Manager. Learn more if the learner doesn’t have an email address.
Username This will be automatically populated from the email address. If the User has an Email Address, then you should not change the Username. If the User does not have an email address, make the Username something unique and meaningful to the User. Once the User Profile is set-up, you will not be able to change the Username. If you need to change the Username, contact Support.
Role The Role you select will determine the functionality the User has within QualityTrainingPortal. Most Users will be set-up as Learners. If you wish for the User to be able to review records of their subordinates, then you would make their Role Supervisor. The Role options you have to select from are determined by your Role. You can assign Roles starting at Learner up to the Role directly below you. For more information on Roles, select that option on the Training Administration Help Menu.
Catalog Access Typically this is set at May Request Enrollment in Courses. However, in special Circumstances you might select No Access to Catalogs or May Self-Assign Courses.
- May Request Enrollment in Courses – These users will be able to see the courses in the course catalog and request assignment in courses. The Training Group Administrator will receive the request by email and will take action be either assigning the course or not approving access to the course.
- No Access to Catalogs – These users will not be able to see the catalog and can only be assigned courses by the Training Administrator.
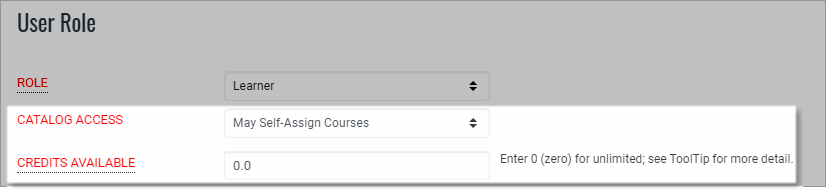
- May Self-Assign Courses – These users can self-assign courses. You can limit the number of credits available to Self-Assign Users or you can allow the User to assign an unlimited* number of courses by setting the Credits Available to 0 (zero). The option to limit the number of credits available to Self-Assign Users is not available in Enterprise Subscriptions.
Once all the necessary information is filled out in the Add User Profile form, but before hitting the Add button, determine if you wish to send Login Information to the User.
Send Login Information to User Checkbox
If you will be assigning courses to this learner, it is not necessary to select Yes to Send Login Information by email as the users will receive a registration email when you assign courses. However, if you are setting this user up as a Supervisor without any courses or as another Administrator or if you are setting the person to self-assign courses, Select Yes so the Users receive their login details.
After Adding the User Profile
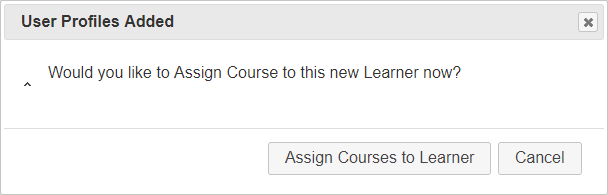
After the Profile is added, you will be asked if you wish to assign courses to the User. You can either say Yes and you will be brought to the Course Assignment screen or you can say Cancel and then you can add another Profile.
Important Information About Adding User Profiles
- The info that you put into a profile is used in many ways. For example, the first and last name is what goes onto certificates of completion. So, if you enter a name using all lower case or all caps, that is exactly how it will appear on the certificate.
- You can always edit user profiles. The only thing that you cannot change is the username which we recommend always be the person’s email address in all lowercase. It will automatically be filled in when you fill in the email address and tab off of that field. If you need to change the Username, please contact us.
- A default password will automatically be assigned and users will be prompted to change it the first time they login.
- If you only have responsibility for one Training Group it will be hardcoded and you will not need to make a selection there.
- Users with Supervisor permissions will be listed in the Supervisor dropdown. You are not required to assign a Supervisor.
- When you Add the User, you will be asked if you wish to add courses.
Adding Multiple Users at Once
If you have two or more Learners to add at the same time and you don’t need to assign any special settings, it is convenient to use the Add Multiple Learner Profiles option in the User/Training Administration menu.
On the Add Multiple Learner Profiles screen, you will need to select the Training Group for all User Profiles you will be adding. Also, select the Catalog Access Permissions. Note: These selections will apply to ALL Users you add at this time.
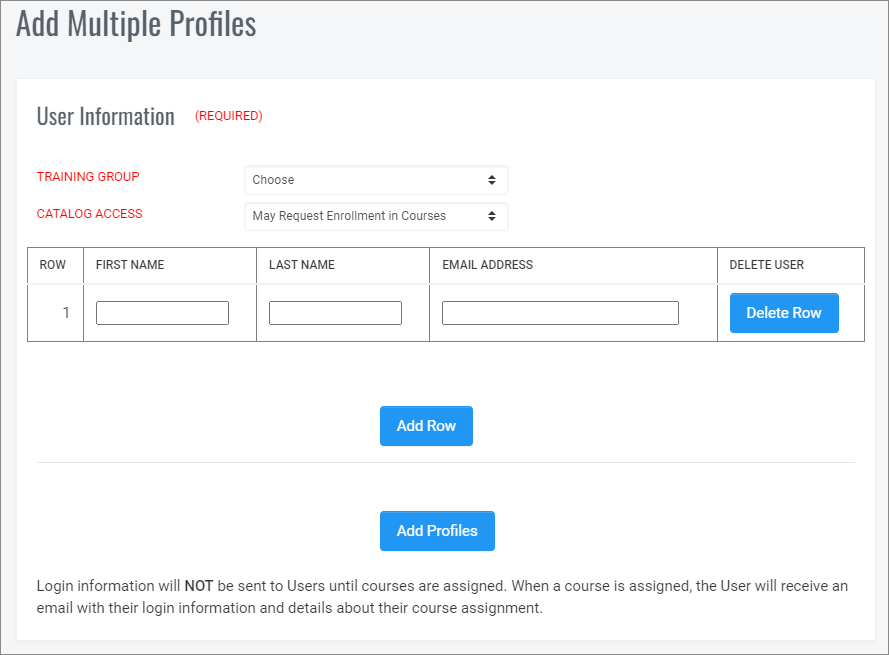
All you need to enter is First Name, Last Name and Email Address. Use the Add Row button to add additional rows and use the Delete Row button to remove any rows you do not need. Click on Add Profiles and the new profiles will be created.
After Adding Multiple User Profiles
After the Profiles have been created, you will be asked if you wish to add Courses for those Users you have just created.
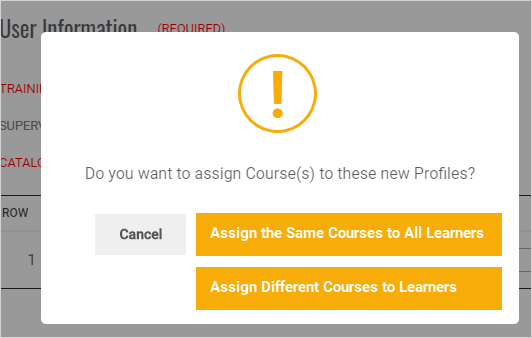
There will be three options.
- Assign the Same Courses to all Learners. This will take you to the Assign Multiple Courses screen.
- Assign Different Courses to learners. This will take you to the Assign Courses screen for each of the new learners you have added, taking you through each, one-by-one.
- Cancel. If you don’t wish to add any courses at this time, hit Cancel.
Important Information
- When adding Multiple Learners the username will automatically be the same as the email address.
- All users entered here will have a permission level of Learner.
- After you add multiple users, you will be asked if you wish to add courses.